Keyboard Tray Buying Guide: How to Choose the Best Ergonomic Keyboard Tray
HTML Source EditorWord Wrap
From an ergonomic standpoint, the two most important pieces of equipment a computer user needs are a good chair and an articulating keyboard tray (See this blog article - What's Important? A Chair and a Keyboard Tray on the subject written by our in-house Certified Professional Ergonomist). We often hear from people seeking a good chair because their arms, shoulders, neck, and upper back hurt. Our response is yes, you should have a good chair but based on where you hurt, you may get more pain relief from a keyboard tray. Check out our keyboard tray buying guide below for help choosing the right keyboard tray.
Want help? Use our Ergonomic Keyboard Tray Selector Tool and one of our fit experts will respond with personalized recommendations. We love to help people find exactly what works for their needs, and we typically respond within 1 business day. Wondering how high your keyboard should be? You can use our Ergonomic Office Desk, Chair and Keyboard Height Calculator to find the correct keyboard tray height for you.
Why Do You Need a Keyboard Tray?
In a nutshell, you need a keyboard tray (also known as a keyboard platform) because your keyboard and mouse need to be close to your body and should be low enough to allow your arms to rest comfortably at your side while typing and mousing. A keyboard tray helps keep your keyboard and mouse within your neutral reach zone - the area you can easily access when your upper arms are at rest beside your body, with your elbows bent. In addition to placing your keyboard, mouse, and keypad closer, most people should tilt their keyboard platform downward, away from the body. This is called a negative tilt, and this angle should be set somewhere from 11 to 15 degrees. All of the keyboard trays we offer are on height adjustable arms and offer tilt capabilities.
Mounting Surface on a Desk
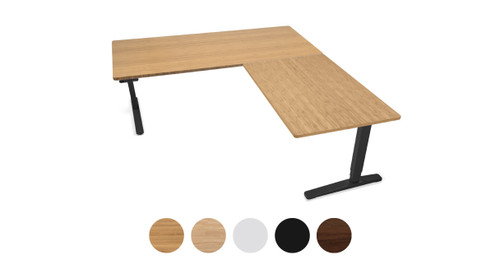
Special note for L-shaped desks: If you plan to mount your keyboard tray in the inside corner of the L, you will need a corner sleeve which extends the desk surface and provides a secure mounting surface for the track. Ask us if you need help selecting the right one.
Most keyboard trays are mounted to a lightweight track that is easily installed on the underside of your desktop using 6 or 8 wood screws. The tray then slides into the track to allow depth adjustment. You will need about a 1" thick surface for the mounting screws (3/4" long), and at least 6" of width and a minimum depth of 11" to accommodate a track. If you wish to be able to store your keyboard slide tray completely underneath your desk when not in use, you will need 22" of depth to mount a 21" track. Shorter track lengths are available, or you can opt for a Humanscale short mechanism which will stow a keyboard tray completely under a desk on an 18" track. With less depth, a shorter track will not allow the keyboard mount to retract fully beneath the desk when not in use. Many people find that this is not an issue, however, because this means that the keyboard is always in proper typing position. If you don't have room to mount a track, we recommend a fixed mount or chair mount solution.
Mechanisms - How to Adjust a Keyboard Tray
The height adjustment range of a keyboard tray system is determined by the arm (also known as the mechanism), which is the part that connects the keyboard platform to the track mounted under your desk. All of our keyboard slide systems include height adjustable arms. However, not all arms offer the same height adjustment range, and many of our trays are available with your choice of several arms. Here are the most common types of mechanisms:
Keyboard Tray Mechanisms/Arms
- Standard arm: A standard arm is the most common choice and works with most users who plan to keyboard while sitting only, or who have a height adjustable desk to use when standing. These will usually adjust from about 6" (varies by arm) under the track to level with the track or slightly above.
- Above the desk arm: An above the desk mechanism is designed to convert a fixed height desk into a sit-to-stand workstation. It will adjust from 5"-6" below the work surface to a number of inches above the work surface. The height range above the surface varies considerably by brand. Humanscale keyboard trays have two above-desk mechanism options that raise 7.5" and 8.5" above the track.
- Short arm: A short mechanism is designed to stow the tray away completely when a standard track can't be used. A short mechanism will stow under a desk completely with an 18" track and protrude less than a standard arm on a shorter track, with the tradeoff being that it also has a more limited height adjustment range. Humanscale keyboard trays have a 5GSM mechanism option that allows you to completely stow the tray on an 18" track.
- Double swivel arm: A double swivel or double pivot arm offers a pivot point where the arm meets the track, along with a second pivot point where the arm attaches to the tray. This is designed for applications where the user may face one direction part of the time, then face another direction such as with an L-shaped desk where there is a monitor placed on each side of the desk.
- Lateral slider: A lateral slider is an additional part that lets the user slide the tray from side-to-side without pivoting the arm. Humanscale keyboard trays offer this option.
Choosing the Right Platform
The primary factors that determine which platform is best are the keyboard you plan to use, what type of mouse you plan to use, the shape of your desk, and how much space exists where you plan to install it.
A standard keyboard platform is rectangular in shape and will fit most keyboards. If you are using a "natural" or wave-shaped keyboard, it may not fit a standard platform since most keyboards are 10 5/8" deep and natural boards often are deeper. For a natural shaped keyboard, you will want a platform shaped to fit it. If you plan to use a keyboard with a numeric pad, you will need a wider platform, typically 25" to 27" wide, such as the Keyboard Tray System Builder by UPLIFT Desk or a Humanscale 500.
Mousing Surface
The simplest solution is to skip a mousing platform and opt for a wider board like the Keyboard Tray System Builder by UPLIFT Desk or a Humanscale 500 that will hold your keyboard and mouse on one level. This works especially well with stationary mice like trackballs or front-placed mice like the Mousetrapper, but these wider trays do include bumpers to keep your mouse from sliding off of the edge of the tray.
Over or under? Mousing platforms are usually one of three styles - the most common pivot from the front edge of the keyboard platform and swivel at or slightly lower than the height of the keyboard platform. Two examples of this type of keyboard system are the UPLIFT Switch Keyboard Tray or the Humanscale Swivel Mouse Platform.
The second type of mousing platform pulls out from the side of the keyboard platform. This type of mousing platform does not offer any height, swivel, or tilt options. The Workrite Banana Board is our most popular model with this style of mousing platform.
The third type swivels over the keyboard platform and in some cases is height adjustable, so the mousing surface can swivel over the keyboard's numeric keypad, bringing your mouse further into the neutral reach zone. Mouse-over platforms usually offer the ability to tilt the platform independent of the keyboard platform, making this type the most flexible and easiest to position. The Humanscale Clip Mouse Platform is our most recommended mouse-over system.
All three types of mousing platforms are available for right-handed users or left-handed users, and some models switch easily from one side to the other, allowing different users to use the same tray. Some systems offer both a right and left platform - you can add right-hand, left-hand, or even dual mouse platforms to most Humanscale Keyboard Systems. The UPLIFT Switch Keyboard Tray differs as it has one mousing platform that can easily switch to either side.
Palm Rests
Use of a palm rest is optional. Some users prefer one, some do not. If your keyboard tray is in your lap and you're keeping your wrists straight, your palms might not even touch the platform. A palm rest is helpful if it keeps your wrists straight and prevents them from pressing against the hard surface of the platform. Your ergonomic professional may have a preference. Palm rests are padded using either foam or gel; gel palm rests are softer. Ideally if your keyboard platform has a palm rest, it should be removable both for cleaning and in case you change products or personal preference and do not want to use it.
Track Lengths
The track attaches to the bottom of our desktop and supports the keyboard tray system. A 22" track will allow most keyboard trays to retract fully beneath the desk when not in use, and that is the track length that is included as a standard on most keyboard trays. Other track lengths are available, if you do not have a full 22" of uninterrupted space beneath your desk. As a general rule of thumb, you should choose the longest track length that will fit on your desk. While some people need the keyboard tray to retract fully beneath the desk, most people find that once they begin using a keyboard tray every day, they never push it back under the desk and the shorter track works perfectly fine.
Actual Desktop Surface Area Usage
See what percentage of your desktop surface area actually falls within your Optimal Reach Zone.

- Optimal Reach Zone: Also known as the "Neutral Reach Zone," this is the most accessible area of your desk and makes up about 50% of the available area on a 30" deep desktop. Your most commonly used office equipment, like keyboards, mice, and personal devices like your smartphone, should be here, in a position that is easily reached with the upper arms at rest alongside the body.
- Maximum Reach Zone: This area sits beyond the Optimal Reach Zone and consists of the area that can be reached by the user if they fully extend their arms while seated. Items placed in this zone should be those that are only used intermittently for short periods of time, like a telephone receiver, task light, or printer.
- Outer Reach Zone: This is the area that cannot be reached without leaning forward over the desk and/or getting out of your chair. The only items that should be placed here are those that are rarely accessed, like monitors, reference books, external hard drives, decor, and other "static" items.


